Saturday, June 30, 2012

V-Buck window frames

As we jump in and get started with ICF portion of the house it starts with getting the windows and doors framed out so we will know where to cut the ICF blocks around these openings.

Enter V-Buck - this is a vinyl product that can come in pre-formed frames according to your window sizes, lengths that match your window sizes for your form on-site or you can just order whole lengths that you cut and form into your window frames according to what windows you have designed. We chose the latter of these options as:
1) they are not hard to cut and form together
2) we have made little tweaks here and there to our window schedule along the way so it left us the flexibility to make any last minute changes we might want
3) it was cheaper to do the work ourselves and ship them in long pieces.


So these are how the lengths arrived from V-Buck courtesy of Bruce Anderson. These frames that the windows will sit in will only go into the ICF portion of the house. The container windows will sit in a metal frame welded to the container cut outs.

Needless to say my first order to Bruce for the V-Buck included lengths for ALL the windows. Bruce thought we have doubled the size of the house since we got our first quote from him. A quick call back to revised the total length fixed the problem and then the lengths arrived. Unfortunately, I also didn't figure out how we were going to maximize our cuts from these 16 lengths of 16'. Obviously you can't really patch two lengths together to the length you need should you end up with off cuts. Ughh.....where was my OCD planning?

We spent a few minutes running through all our possibilities on paper on how to maximize our stock to get all the lengths we needed but came up one length short. Then I figured there must be some free computer downloads that could utilize algorithms better than we could to find out optimal cut layouts that would get all our lengths out of these 16 pieces.

Off to the computer I ambled and 3 hours later, a few downloads it was determined that we weren't half bad with our calcs and that yes we do need one more length and in fact we came up with a better layout for our cuts than the programs did - HA!

The first program I downloaded was an add-on for excel called 1D Cut X. I am a HUGE lover of excel and thought this was a perfect solution. 


It was rather disappointing. No matter what I did it kept telling me I needed 18 lengths and not the 17 we had calculated. 


So then I downloaded an independent software called 1D Stock Cutter from Astrokettle Algorithms (what a great name). This was FANTASTIC, you could set it to reduce your number of layouts or optimize your leftover length. This last one seems to be pertinent to those in industry to maximize leftover stock. A very cool program and it just verified that we do need one more length. 


This is the layout print out that the 1D Stock Cutter provides you, it is so easy to use and follow. I highly recommend it.

So the first thing I did was to order the three remaining lengths that we needed at their specific lengths as this would be cheaper for shipping than just ordering one long length. V-Buck is a cool product and is completely recycled vinyl out of Utah.


Here are all our lengths cut out to size to match our window schedule. They cut like butter but they produce tiny little pieces of vinyl confetti that floats everywhere. At first it is so cool and fun and then you realize it is in your ears, down your underwear and just gets everywhere.


V-Buck also provides you with the connectors that attach the sides together as well as the braces for the corners that keep the frames square. It is so easy it almost feels like cheating especially after working in the containers where the whole process is figuring it out as we go and having to be very ingenious with our solutions. V-Buck is like building with legos, cut and click!


Here is our first window frame complete, it is really lightweight but the funny part is that this is a 5030 window, a size of window that we don't have in the ICF. The beauty of these frames is that you can just pop it apart and stick in the different lengths to make it the right size.

One down, 14 more frames to go.....


Wednesday, June 27, 2012

Good Use of the Crawl Space


Doggies being smart and staying cool. They realized how much cooler it is in the crawl space under the house. 

Upstairs radiant

And the last of the radiant is in!


As we did downstairs, Kyle tweaked the engineered plan as apparently they didn't get the "we can't go through the walls" but the new plan worked out and again we tailored the radiant as to where we wanted more heat (under the potty and in the shower) and less heat (the closet).


It worked out great because the doorway into the bathroom has the south side runs travelling through it which will make that walk to the bathroom in the middle of the night or first thing in the morning nice and warm.


There are 3 circuits that run upstairs which makes a total of 10 circuits for the entire house that will be worked into 3 separate zones to manage temperatures accordingly. Each circuit has a supply and a return, you can see the S or R on each pvc tube and can't be longer than 300'. Each circuit must also be similar in length to keep the pressure equal.


Here is the pex running through those pvc piping through the floor. 
  

And the manifold all hooked up and under pressure.

We have already had the whole upstairs inspected by the county so just waiting on Tim our concrete guy at Precision Concrete to return with the Concrete Pumper Dude, Ed, to get it poured.

Meanwhile we are onto the next - putting together the V-Buck for the window supports in the ICF portion of the house.

Unexpected effort

After this failed attempt to quickly paint one of the walls of the utility room was cleaned up and we found the RIGHT primer, we thought that getting back to priming the rest of the containers would be straight forward. Ahhh, yeh, not quite. I hit all the spots on the metal that needed attention, the little rust spots here and there and was feeling pretty good till Kyle came in and pointed out ALL the spots I missed.

So back out came the grinder, on the walls, on the ceiling, in the corners, on the edges.


Phew, and that ceiling shot doesn't even capture all the grinding that went on, really it doesn't. There was lots more than you can see, really. Well, upon completion of the grinding we did a quick power wash to get rid of all the dust and then let it dry.

The next day we set up the paint sprayer and filled it with primer and went to town.....

We use a Graco paint sprayer which is great for exterior or areas that don't require great precision (i.e. where you can get paint everywhere and make a huge mess). It is a 100% must have if you are painting a ceiling, it is a life saver, ridiculously quick and easy.


And this is the previously blogged about primer that works really well on the already painted metal, really does the trick. I initially bought one 5 gallon bucket of it.....uh, we are now on the third 5 gallon bucket and still have to do upstairs. The paint sprayer uses a lot of paint and this stuff is thick.


It looks so much better all white and clean and smooth. Makes a huge difference. Of course Kyle is nervous right now that somehow it will stay white, he isn't so thrilled with that fear thought.

Meanwhile Kyle has been busy doing the last preps for the floor upstairs before the radiant pex goes in. Below he installed a piece of angle iron abutting the exterior steel beam that will allow the concrete to be poured to the full height that will make it flush with the loft floor once that goes in.


And at the back of the containers Kyle installed some more, larger angle iron pieces that he had, had made. We then stuffed the cracks with insulation so it is all ready for concrete.


These are the pvc pipes that the upper floor radiant pex will run through and allow them to smoothly rundown through the floor into the utility room to the manifold.


And below is the opening all scoped out for the laundry chute that will house the porthole - Yeh!


That will house this baby on top of the concrete floor.


Phew, next up radiant.

Saturday, June 16, 2012

Our house guest learning to fly

Well the nest is empty but one house guest is still learning the nuances of the wings.

There were 3 babies but it looks like 2 didn't make it early on. So this little one has made it out if the nest but is still hanging out in what is supposed to be my bath tub.


Hope he figures it out quickly.


Friday, June 15, 2012

Making life a little easier

Kyle saw a great deal on Craigslist, where else, for some scaffolding. We have one set of scaffolding but between grinding the ceiling, building the walls, siding, etc.... an extra set would be really useful.
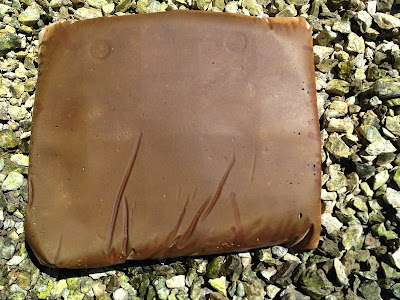
So we jumped in the car after work last night and high tailed it to West Sac to beat the rush and pick up the scaffolding. Because you know how Craigslist works, first come first serve.

$100 out the door and it was ours. Good thing we moved fast as the guy had 20 calls on it. Proof we got a good deal.

Best part is it comes with wheels and you know how I love things that move by the push of a finger. Everything needs to be on wheels. Except those Tweens that wear the shoes with wheels and plow into you at the grocery store, they need to be crated.

Wednesday, June 13, 2012

Ups and Downs of Staining Concrete

Since before we poured the first floor concrete I started experimenting with stain for the final concrete floor. I practiced on the crawl space floor, the foundation wall, the old slab in front of the workshop, pretty much any concrete I could get near got a taste of my staining expertise, or lack thereof.

After a little research I found out that you can use iron sulfate to stain concrete. Iron sulfate is common in a lot of garden fertilizers and even warns on the bag - "will stain concrete". YEH! That is what we want.

So I found a few different types at various local gardening stores that were 19% sulfur and 33% iron, the recommended amounts for success. Here and here are where I got inspiration from.


Fertilizer in hand I was sure I would end up with stunning floors. You know something that looks like this.

Umber stain, photo via howtostainconcretefloors.com

Well, I followed the instructions from the blogs and tried a few test areas. Not seeing any immediate results a changed the process up a bit and tried a few different ways. The center section below is an example of what I got.


Yeh, Nothing, Nada, Zilch, Nill, Naught, Zero. Ughhhh, I knew it was too good to be true. Fortunately the fertilizer is pretty inexpensive and I can use it in parts of the garden so not all is lost. 

The sections on either side of the disastrous fertilizer experiment were done using Brickform. We picked up a couple of samples the last time we were at Cemex, yes, like Home Depot, it is a regular destination (Kyle knows how to show me a good time). I applied the samples a few different ways, sprayed it on, painted it on with a paintbrush and poured it on and spread it with a rag. What you use to apply it is critical, you can see the lines here where I used a paintbrush, No Go. It was not a good look. I didn't really like the colors either, they came out a bit orange looking. 

A few years ago I fell in love with Kemiko floors but had forgotten about them till I was doing more research on acid stain for concrete. Still madly in love with these floors I ordered a few samples and when they poured the concrete floors downstairs Kyle had them pour a few little samples that we could use to test the new stains.


This one is Malay Tan. It could ideally use another coat but it is quite light in real life. This picture doesn't really help the true the shade but it is not a deep, warm color we were looking for.


This one is Cola, and on the Kemiko website it comes across as pretty dark but our sample didn't turn out that dark. This one has two coats on already. In real life it has a lot of green in it but it is not bad.


This one is Umber and is the WINNER, ding, ding, ding. It is two coats pretty straight and is just the leathery look that we want. I knew it was a keeper when Kyle walked up and just said "that is IT". It is gorgeous in real life, deep, rich color and just mottled enough. 

There will be a lot of variation when applied to the entire floor as the acid reacts differently with the concrete depending on how the concrete makeup varies. If there is more lime in one area the color will be slightly different than other areas but that is the beautiful irregular look we want. Sort of like this-

Photo source - Kemiko.com

Check out HERE for more pics of different stains...they are stunning. Of course the au natural look is also my favorite - like what Marti did on her floors at the 8747 House.

Well in the midst of installing poop pipes and miles of pex tubing it is fun to think about something finished and pretty. Back to figuring out how to vent the kitchen sink.....oh the life:-)


Sunday, June 10, 2012

Housekeeping

And we are back. Things ARE moving along, lately it has just been a lot of housekeeping stuff which is not really interesting or visually captivating.

We are just about ready to pour the second floor but it has been much of the same with cutting holes and installing little pipes sticking up out of the ground. So more little pipe forests. We did cut out the hole for the porthole window that will be the laundry chute, I will get a picture of that. The second floor takes a different kind of concrete that is lightweight and has pumas in it. This will have to come from Cemex rather than our local concrete source in Georgetown.

Kyle buried some more of the water pipes on the property so things are a little more automated now which is making life easier and keeping all the water storage tanks full all the time. The solar pump is now working to fill them all which is fantastic.

I have been doing a lot of metal grinding (much overhead, Grrrrr), trying to clean up the inside of the containers prior to the primer going on. Everywhere they hit the sides or ceiling while moving goods in and out of the containers over the years leaves little rust spots that have to be smoothed out before we paint or else the rust will bleed through. It is a very repetitive job, but apparently that is what I am good for;-)


Kyle also got the bedroom cut out so we now have two access points to the second floor when we pour the concrete in there. We have put our scaffolding up against this so it will be easier for the guys to get in and out and to run the big concrete pumping tube through.


The man behind all this madness, seems a fitting picture!


We got all the ICF blocks delivered which was a challenge as the truck that brought them in. The truck was a tandem which doesn't do so well getting up here and too boot it was VERY tall, it barely fit under the power lines. Needless to say the truck driver was NOT happy.


After researching all the different types of ICF blocks on the market we went with Fox Blocks. We have worked with Kent Yonkers of Performance Wall Systems out of Volcano, CA who has been a great resource. Fox Blocks have the highest recycled plastic to foam content of all the blocks in the industry and they are made in Bakersfield, CA which was important to us. And of ICF is one of the most efficient construction type and the best part, ZERO waste.


We also had all the VBuck delivered, thanks to Bruce Anderson at VBuck for bearing with me as botched the calcs and had to re-order. This is the vinyl supports that we will make up that will frame out the doors and windows in the ICF portion of the house. It is long lengths of rigid PVC, so no off-gassing and because they come in lengths and we cut and snap them together onsite there is less waste or mis-calculated measurements. They shipped from Utah and are 99% recycled PVC, no thermal bridging, energy efficient and no wood to maintain or worry about. 


So in the meantime we have been enjoying a few evenings on our future patio, it has been cool here so far this year so we have employed our repurposed fire pit - a salvaged drum from one of the many washing machines we had on the property when we bought it, thanks for the idea James Gundlach. It works very well, but....


remember to remove the seal plug prior to lighting the fire or else once at temperature the thing becomes a projectile. Learning the hard way sometimes.


No one was injured in the use of this washing machine drum as a firepit, but it was close!