Tuesday, August 20, 2013

Real time blogging

Fast forward to this past weekend I figured I needed to blog about something far more interesting and and visually satifying than black ABS vent pipe. A post about paint drying is more interesting than ABS vent pipe. I will return to the chronological progress of the house next post.

This weekend we knocked out a big project that has been in the planning from the beginning. Remember THIS post where I attempted to design and locate our propane tank pad which will also house the generator and hold the hot water solar panels?

 
I created this sketch-up with the Google software and it was going okay until I realized that my wall had no back and most of the posts didn't reach the beams. But the County and our concrete guy got the idea and fortunately didn't take us seriously when they saw it mapped out....

 
Google maps dumped it on a restaurant roof in Boulder, CO and the sucker wouldn't budge - FAIL!


Tim Crews from Precision Concrete poured the pad and retaining wall, more on that HERE. And this weekend we got to town on finishing the structure so we can get the solar panels up.


It went up pretty easily though I have some doozy of bruises on my arms trying to get those 12' beams into place and poor Kyle took the brunt of the lifting.

 
Once the posts were up, the cross beams in place and the large perpendicular beams up we roofed it using some of the panels we cut out of the containers. After cleaning and grinding them, we srewed them down to the structure frame and caulked the seems. This weekend we will paint the roof top in preparation for the strutting supports to go on that will hook into the solar panels.
 
 
This little house gives shade to the propane tank, our backup power generator and a water pump. All the piping to the house comes in through the middle of the back wall. It will be easy to maintain and protect this equipment from the elements. You can tell we wrapped this project up just as the sun was setting on Sunday night.
 
We have some more long-term ideas for this structure that are REALLY cool but you y'all will have to wait and see. We have so many ideas for the leftover panels from the containers we might run out of them. For the time being, this is another project off the list!!

Wednesday, August 14, 2013

Hold on to your pants - we got us some plumbing

Really can't gush on this post, can't go on and on about the joys of plumbing and indoor running water and flushing toilets. It really is NOT glamorous, exciting, adrenaline rushing or remotely interesting at all.

But nevertheless in the name of full disclosure and just because I went to the trouble of taking the pictures I will share this momentous milestone with all of you.

The plumbing has proved to be a challenge as all the 'water' appliances are in the container side of the house and having sandwiched two containers together we don't have the luxury of an interior wall to chase plumbing pipes through. Hence there were a few renditions of the plan but Kyle finally came up with a layout that fit the house, that we could work with, with the finished look of the house and most importantly a plan that the County Inspector signed off on.

We needed to get all the plumbing pieces installed before we could have the spray foam insulation applied as it would be a huge ordeal to cut through it after the fact to run the plumbing through both in the walls of the exterior of the container and underneath the containers. Kyle also ran all the conduit for the electric underneath the containers so all we need to do is run wire to connect the dots.

The other thing we needed to do before we could even put most of the plumbing and electric in was to clean up the underneath of the containers. Sounds easy enough, it is cleaning........WRONG!
THIS WAS THE MOST DISGUSTING JOB AS OF YET ON THIS HOUSE BUILD. Did you hear me, DISGUSTING.

It involved laying on my back on one of those wheeled boards that car mechanics use with a metal grinding wheel in hand, eye glasses, gloves, a face mask, a face shield in 90+ degree weather and on the second go around, a doo rag as it took me days to get the rust pieces out of my hair. Grinding the rust off the underneath the containers was miserable. It went everywhere, in every crack, nook and cranny. I came out from that 2' crawl space each time covered head to foot in brown filth, I was filthier than any time from the horse days. So glad that, that job is behind me and done and the black widow spider was relocated (to the vacuum).

Anyway, onwards and upwards after buying about 200+ plumbing elbows, turns, angles, connectors, reducers and multiple other parts and pieces that seemed to have no name but all come in black ABS plastic.


It is tricky to plan the venting for every single toilet, sink, shower etc..and how they can all tie into one another so your roof doesn't look like swiss cheese. This one above is for the kitchen, overcoming the venting code to maneuver around the window directly above it. 


This is the downstairs bathroom for the sink, toilet and shower. We lucked out here because of the site built wall between the bathroom and laundry room directly behind it.


This is the master bathroom, difficult to overcome some challenges here as there is the structural red iron on the exterior of the house that we cannot drill through so took some ingenuity on Kyle's part. And again the window issue above the sink came into play. This design resulted in some unique design finishes that we came up with so stay tuned for that down the road.


This takes the downstairs bathroom vent up to the roof. This runs through the master closet and will get chased out.  


Drainage from the master bathroom shower (above) and toilet (below) that come down into the utility room and back hallway, respectively and the hallway will get chased out.


Our clean-out, the final chase design will provide a small broom closet here that will allow access to the clean-out.


So once all the plumbing and venting network is in place the openings to the fixtures get covered up and then the entire system gets filled with water to ensure that there are no leaks. Here is Kyle filling the whole system from the roof top. It was actually kind of fun and SUCCESS first time. Way to go baby, nice planning and install. Who needs a plumber and we have INDOOR plumbing. It was all worth it.


And a moment to appreciate the nice view a the end of it all. Phew.....now on to the next thing - insulation!


Thursday, August 8, 2013

Somewhere to hang the welcome mat

We found this incredible local guy - Jim Briggs of Jim's Custom Doors and Molding who does gorgeous doors and woodworking so we took over some of the huge wood panels that we salvaged out of the old mobile home to see if he would make a door or two for the house.

Of course Jim couldn't be nicer and it is very cool to see some of the projects he has going at his shop. We are pretty small potatoes compared but he still did an amazing job.

The wood panels are big 8' by 4' and 2" thick cedar panels that lined the living room and some bedrooms in the mobile home that was on the property. They were originally milled from trees on the property so it was important to integrate them into the new house in some way and what better way but the front and back doors.

The back door (technically side door that is on the north wall of the house) also needed some special installation in the form of a doggy door. But no ordinary doggy door. It needed to be tall enough for Denali to get in and close enough to the ground that Ziggy could jump through. We also worried about energy efficiency as some of the dog doors don't close very well after repeated use and we wanted something that would hold up to all four, yes four dogs now, using it multiple times a day.

After a lot of research we came across this door.


The Plexidor opens up sideways rather than one large mono-flap like most dog doors. This type of design holds up much better and is more energy efficient with a tighter closure than most doors. It is also safer via the locking mechanism and is NOT white which was very important.

So with the new doggy door in-hand, Jim got to work on the doors. And in no time we had a front and back door ready to go.


Front Door


Back Door with opening where the doggie door will fit in


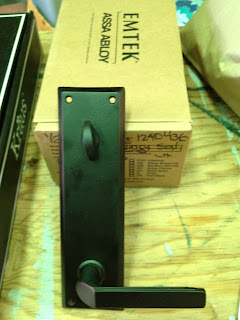
We also had to source the hardware for the doors. The hardware we really wanted were handmade from Chili and about $700 per door. So we had to settle for something a little simpler and we went with simple black hinges, hey, you gotta make compromises here and there and pick your indulgences.


So now the doors await a good coating of tongue oil and then they can be installed. We aren't in a hurry to get them installed until all the big construction work is complete in the house for fear the glass gets broken or they get dinged up. So they are in safe storage in the house for now. 

Next up, that pesky plumbing and venting. And pesky is putting it nicely.