Wednesday, June 25, 2014

Put a Hat on it

We all know how key hats are to keep warm in winter or keep the sun off us in the summer. Or if you are lady on Derby Day you KNOW how key a fabulous hat is.

Well it is the same with our house, the hat is key to both look and performance. We knew pretty early on in the planning process that we wanted to go with a standing metal seam roof. This was for a few reasons, the first and most important was solar reflective index (SRI) which is a measure of a surface’s ability to reflect solar heat. I wrote more about this here.

Not having air conditioning in the house, we needed to jump through hoops to make sure we minimized as much heat entering the house as possible. A lighter colored roof was key to reflect as much sun in the summer as possible and this could be best accomplished with a standing metal seam roof.


They also have great longevity, it should last over 30 years, it has a minimum of 25% recycled metal content and is 100% recyclable at the end of its life, has little to no maintenance and looks great. We went with a galvanized metal roof that has a light silver look and high SRI. White would only have been better.


We are really happy so far with the roof, a few angles made installation tricky on the spare bedroom roofline but we worked with a local roofing contractor and got 'er done.

Roofs are one of those house parts that  you don't want to think about much after installation but investing in a good roof is key to that being possible. As with many of the other parts of the house we chose to invest the bulk of our money in pieces that won't be replaced in our lifetime. We will remodel kitchens and bathrooms and redecorate but getting great windows, roof, insulation was vital and hence took the majority of our budget.


One of the important pieces to a good roof is sealing all the protrusions through the roof like vents and the chimney. Though the chimney rises on the outside of the house we still worked hard to seal the area where it penetrated the roof as the roof structure is wood and we didn't want water seeping and compromising the framework.

And so far this spring/summer we have had some quite warm days and that house is cool as a cucumber!!

Monday, May 5, 2014

Latest and Greatest

Even though I have a few more posts to get you to where we are now there are many, many requests to see pics of what the house looks like now, so here are a few latest and greatest shots.


Master Bath Shower and vanity- still awaiting a soaking tub but it is pretty nice with a great view.


Master bedroom - yeh, we need a bed and the temporary railing will go out to the deck eventually.


Loft area overlooking the living room


Kitchen where you can see the container walls


Rear view of the house and back patio. The metal posts are going to hold the deck off the master bedroom.


Side back view of the house with the second bedroom off to the right
 

Look through the front door across the entryway and living room out the back french doors.


Front view of the house

Tuesday, March 11, 2014

What the .........

Type L copper pipe versus Type M, is pipe measurements for electrical pipe is OD but yet for plumbing it is ID, the fact that 6" lumber is actually 5.5" if you are lucky, probably more like 5 and 3/8" but all plywood is measured in 32nds, arc faults, thermal bridging, % fly ash content of concrete, multiple contradicting charts indicating distance of sprinkler heads in relation to surrounding obstruction.....and the list goes on of things I never thought I would be uttering in life and now my world revolves around these bizarre issues. You go into building a home mostly concentrating on layout and fireplace design. You dream of wall colors and a kick ass kitchen faucet BUT in reality 99% of your time is spent researching, worrying about and stressing over sheer walls (picture really ugly, ridiculously heavy metal panels that make screwing anything into them near impossible), the height of steps out of each door and not picking out cool looking electrical receptacles but making sure they are GFI and tamper resistant (because of all the babies we have crawling around sticking pennies into outlets) and pondering over why we need an outlet every 12'.....who plugs that much stuff in?

Source - Yes, would LOVE this staircase.
You can see the dream isn't quite the reality and if you are brave enough to crack open the International Building Code to look for some clarity on some of these bizarre code requirements - good luck. It is pretty much written in Na'vi (that language from Avatar) and if you are REALLY brave and start to look at the Electrical Code or god forbid, the Plumbing Code, your head will just spin off and fly across the room. You wonder who writes this gobbledygook because it isn't decipherable to the average human. 

Source - always a way around


They say each code requirement is a result of some idiot doing something stupid and filing a lawsuit to someone over it - you know, the American way. So as we come across each code limitation requirement you sit quietly to ponder the event that resulted in that code addition. Of course most of them are not PC enough to repeat so I will leave it with your imagination.

I do get frustrated at these glorious pictures of beautiful homes in magazines and online only to realize they must be built in southern Zimbabwe because there is no developed or half-developed country that would allow half these blatant code violations to fly. And then you see homes in our area that have so many dangerous issues but have been grandfathered in and are just a heartbeat from a 911 call. But we are required to jump through more hoops, spend more money and lock down more stuff, add more precautions and I am sure the ones that come after us in years to come will have to do even more to make sure they, their neighbors and visitors don't EVER get hurt hurling themselves through a 4.01" gap in the stair railing.

Source - as long as you aren't a sleep walker
And all those beautiful restored timbers that we love to reuse out of old barns and factories - just for show. Don't even think of using them structurally, that won't pass code.

Yeh, not be Debbie Downer here, but keep dreaming, this bedroom ain't never passing code. Of course many of the code requirements do in fact exist to save lives and have made our houses so much safer over the years.

And yet there are still building approaches out there that won't stand the test of time as seen in Charlotte, NC the other month. If you are condo shopping in the southern NC area, steer clear of this builder.

Source - just not acceptable
So it is a balancing act, the building code works so well in so many ways and has made us safer. It is a tad slow to adopt new building technologies but the entire building industry is sloth like in adopting anything new and is way behind the times and many other developed countries in adapting to new building techniques. But there are some codes that just make you chuckle, scratch your head and shrug your shoulders and surrender to it.

As we get close to our Certificate of Occupancy - I have to laugh that our county is concerned with how shy we are - requiring bathroom doors before signing off. Go figure.


Friday, January 31, 2014

Decency please - Covering up

You will remember the big road trip we went on to pick up the plaster material we would be covering the ICF with both interior and exterior. Well you can always refresh your memory and relive our adventures here. It was actually a really fun trip and Adam at Gigacrete was a great help both when we were at their HQ and on a few follow up calls we had with him. You can read more about our decision to go with Gigacrete and what they are here.

Well we were very excited to get started with the plaster, particularly on the exterior to protect the ICF from the sun and because, well, yellowing foam wasn't a look we were going for long term. So Kyle and I figured we would start by plastering a small portion of the front wall that would be ultimately set under the porch.

We began with a test wall on the inside that we ultimately will be covering with a cool second cover but needed to have a fire barrier in the meantime, and that is what Gigacrete serves as. The interior poduct is 
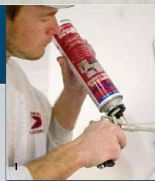
plastermax which requires a special admixture instead of just plain water. You need to mix the admixture 24 hours in advance to let it "rest", poor thing, must be exhausted from having to merge with all that water. While it was sleeping we got on with prepping the wall by cleaning it and then rasping it with a rough rasp that breaks up the surface like this one. It isn't the hardest job as it glides over the foam pretty easily and digs into the surface uniformly. The hard part is that you end up COVERED in little foams bits, and I mean covered from head to foot, up the nose, in the ears, you are sneezing out white bits for days.

This is THE RASP

With this done we gave the wall one more vacuum to remove said white bits and add edging to the seams between the wall and the door and windows to give us a gauge as to how thick to keep the plaster on the wall to ensure we didn't taper off and create a week transition.

With all this work done we were excited to get ready to actually plaster. We decided to apply it to the walls using a hopper gun run through our compressor. Kyle would handle the hopper gun, get the product on the wall and I would follow him troweling. The process is to lay on a coat of about 1/16" thick, then add fiberglass mesh, trowel that in and then go back over with a second coat of about 1/8" thick. Sounds easy enough.

We collected all our equipment, hopper gun at the ready (just used a regular drywall hopper), trowels, edging tools, hawk and trowel for those little areas where we wouldn't be able to get the hopper into easily. And we were off. Mixing up our first batch of product, looks good. Not too sloppy, not too firm. Do a test spray on an old piece of plywood.

STOP
the product was too thick, wasn't coming out of the hopper at all. Okay, add more admixture to thin it out.......a little more admixture........a smidge more. Okay, it is coming out of the hopper now and not even reaching the wall but slopping down the hopper to the floor. Up the compressor psi, more power - GRUNT, GRUNT, GRUNT. Okay, it is reaching the plywood surface and dripping all the way down to the ground.

FAIL
okay, little more tweaking with adding more dry product, upping the psi - okay seems like a good balance. Time to the hit the wall for real.

Fast forward 3 hours, we had finished about 23 square feet (we had about 3,500 square feet to plaster, at this rate it would take us 456  and a half hours to plaster the whole house, 19 days working 24 hours a day....hmmmm, what were we doing wrong, why did it take so long and we were EXHAUSTED after those 3 hours. How would we feel after 453 and a half more hours?

So we left it for a few days, went to work on other things and then decided we need a bigger hopper to get more product on the wall faster. So we ordered an industrial hopper. This would solve EVERYTHING! The answer to our dreams. It was delivered and we were excited to give it another go. We prepped more wall, mixed more admixture and left it to get its' ZZZzzzzzz. And we were off again.

STOP
Wasn't going on any faster and we ended up with more product on the floor than on the wall. Cue cartoon deflated music here. This was the answer to our dreams, our key to cutting our 453 and a half hours down to 20-30.....what happened. We now were also almost a bag of product in the whole with all the waste that ended up on the floor even though we tried to scrape it up and re-trowel onto the wall.

Maybe we can just trowel it the product onto the wall with the hawk and trowel like the experts do. Doesn't look that hard.......scoop onto the hawk, scrape onto the trowel, apply to wall in large sweeping motion. Easy.

NOT
This stuff wouldn't stay on the hawk, every time I moved it rolled whichever way the hawk was tilted. Getting it on the trowel, virtually impossible and keeping it on the trowel OR the wall for that matter was IMPOSSIBLE. Again, pounds of plaster coated the floor and that white foam just stood there staring, laughing, mocking.......

Needless to say we gave it to the good 'ole college try in 3 separate attempts to rid our view of white ICF foam, 13 hour investment and only 69 square feet covered. Only 3,431 square feet to go. And the outside product wasn't any easier. The exterior Gigacrete product, stuccomax is easier to mix as it just uses water but it didn't magically go on the wall any easier.

Plan B - get help.

So I asked our concrete guy - Tim Crews if he knew of any plaster guys. I had called a guy off of Craigslist which was a disaster on the phone alone so I needed more resources. Tim recommended calling Vista Builders, a concrete supplier in Auburn, CA, who were SO UNBELIEVABLY nice and gave me a few names of local guys. Called guy #1 and he got right back to me, came up to check out the project and laughed at our feeble attempts to imitate his skill, and rightly so.

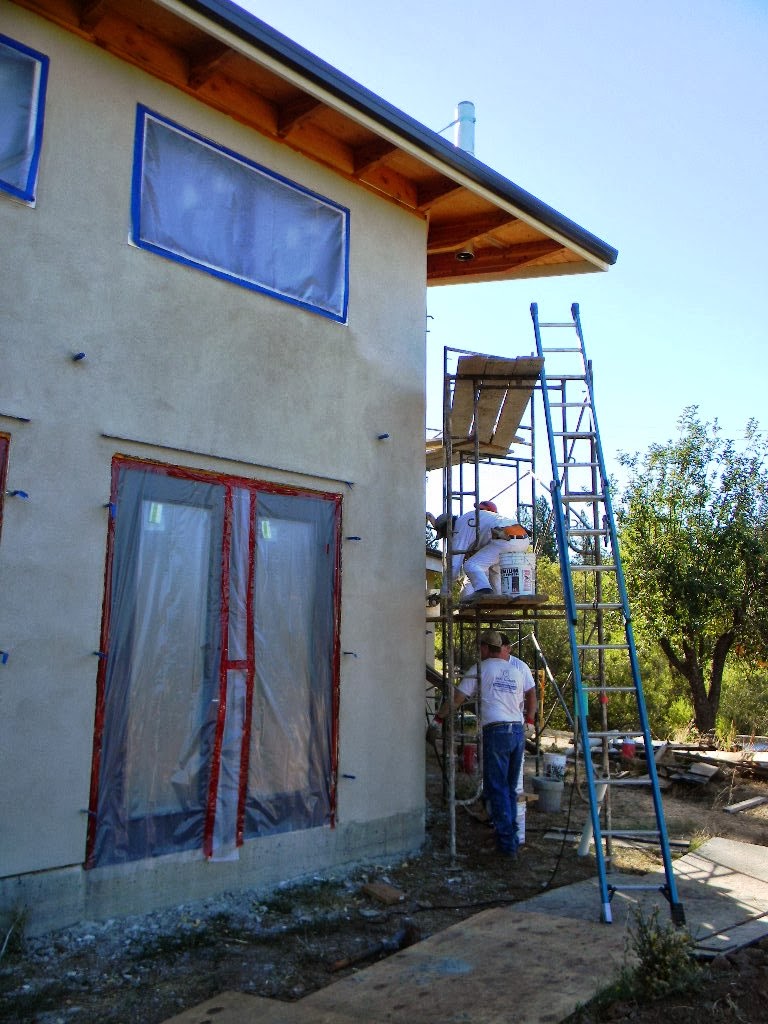
Needless to say within a 2 weeks we have a crew of 5 guys up at the house plastering their hearts out with amazing skill and talent while Kyle and I worked feverishly to mix product and keep their hawks full of plaster. It was a crazy 3 days working non-stop to keep up with the guys and then another 3 days to do the interior with a smaller crew.

So a few lessons learned from this experience. Plastering is not really a DIY project and it actually takes a village. Mastering the hawk and trowel takes years, is an art in itself and the next time I am cocky enough to think that I can just twist my wrist and gracefully smooth plaster on my wall - WHACK me over the head. If it took 5 professionals 3 full days to plaster the exterior with us both mixing full time to keep them supplied, what on earth would it have taken us to finish up.....we were nuts.

I am glad that we didn't waste too much time trying to figure out the plastering world ourselves and that we were able to use our little network to source these great guys that came up and knocked our place out in no time. Call me humbled!


Not sure what K was doing but you can see the drying plaster in the background

Interior plaster

I can tell you this Gigacrete stuff is amazing. It is harder than anything I have ever seen yet has a soft, natural look. We love that it is a green product and so far is holding up perfectly. We are really impressed and would recommend Gigacrete to anyone looking to plaster inside or out.


Saturday, January 11, 2014

Foam, foam and more foam

As if it wasn't bad enough that the entire one side of our house is made up of this fluffy white foam, Kyle is a foam addict with that spray foam gun, he foams EVERYTHING with 4x more foam than he needs to fill a void. I swear he would have insulated our entire house with that little spray foam gun, just like the one below.


We have gotten a lot of the tools for the ICF block and foaming from Wind-lock, and they are great to work with. Especially when you are ordering cases of foam and foam cleaner;-)

The ICF side of the house comes pre-insulated but we needed to insulated the containers and the roof over the whole house. So we found Spray Foam Energy Solutions and George, Pedro and Dave hit the ground running on some of the hottest days of the summer and started spraying foam. It is a rough process as first off EVERYTHING has to be covered with plastic. Dave worked like a fiend getting plastic over everything and Pedro donned the big white hazmat suit and breathing apparatus and was armed with the spray gun and got started spraying foam into the roof and under the containers.

It was a few hot, hot days and I felt for Pedro in that suit and holding a spray gun with product coming out at insane temperatures. It was sure rough going but those guys powered through and got the whole house insulated in about 4 days.

It was tricky to get in all the nooks and crannies and NOT get this stuff over everything else in the house. Most of the house looked like an episode from Dexter -


Yah, freaky, right. but it did protect most of the rest of the house, though I am still pulling staples out places you never thought staples would go.


It made the house pretty weird looking, like it was full of butter but it sure filled the voids and puffed up to fill each cavity.


The insulation was sprayed in between the metals studs right to the container sides on each side of the containers as well as in the roof and underneath the containers.


And you can still see the white foam blocks of the ICF on the right, the OTHER white foam. We also sprayed foam in between the beams in the roof of the ICF portion of the house. We have rigid foam on top of the roof between the plywood sheathing, ice and snow cover, felt and the metal roofing. We also added the spray foam on the inside which will get covered up by different materials depending on the room, stay tuned!!!


Spray foaming way up on the scaffolding in the living room.


After the foam was sprayed in a sheathing of plywood went over the top and attached to the metal studs.


And then had to add another layer of rigid foam over the plywood before the siding went on. This was stop thermal bridging between the screws for the siding and the metal studs. 


The red lines are a special tape that we used over each seam to ensure that they were covered and no water would seep in there.


So onto more windows and siding for both the containers and the ICF.......Whoop, Whoop!